


Victor Vu shares his interpretation of an iconic Disney character that will have you believing in fairies.
Hopefully, you’ve become well acquainted with my Peter Pan design, (if not check out the June edition) and now I want to share with you the perfect pattern to go with it.
Tinkerbell belongs by Peter’s side, but just like the strong-willed fairy herself, this latte art design stands on its own as a bold and fun pattern.

This pattern is an update of the Tinkerbell design I shared in the 2019 Australian Latte Art Championship. I have a few different designs showcasing Tinkerbell, but chose to share this one due to the extra elements in the cup, providing more opportunities to refine your technique, increase the level of detail, and challenge yourself.
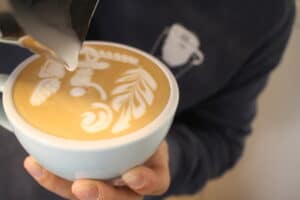
A wide and controlled rosetta-like pattern on the left forms the top of a tree, while a simpler swerve along the bottom creates a branch for Tinkerbell to land on. These additional features create an environment for the character to inhabit, meaning even someone who’s not a Disney fan can appreciate it as a beautiful fairy design.
The pattern is a demonstration of how to best utilise the space in the cup and has a big emphasis on pouring technique. Some danger points to consider include the moon-like shape in the background and drawing Tinkerbell’s wings too far from her body, which is largely formed using a mix of rosettas and dragging of straight lines.
The pattern is complex while using simple techniques, making it the perfect design to practice while spreading your latte art wings.
So ‘tinker’ away with this new addition to your latte arsenal.
BeanScene is now on LinkedIn! Follow HERE to stay up to date on all things coffee.
This article appears in the October 2021 edition of BeanScene. Subscribe HERE.
Victor Vu’s Spartan Warrior
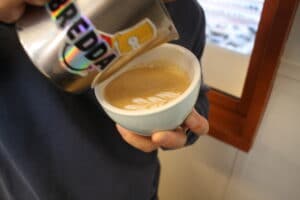
Step 1
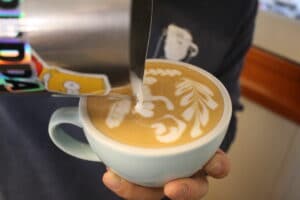
Fill your base and with the handle at 6 o’clock. Pour a wide five-leaf rosetta along the top of the cup from left to right then pull through.

Step 2
At the bottom right of the rosetta, pour the first three quarters of a circle, then drag back underneath to the top of the circle and pour a question mark-like shape within the circle. You don’t want to completely fill this circle to give the moon a shaded appearance.
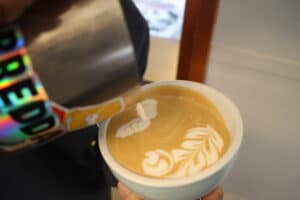
Step 3
In the bottom half of the cup, pour two small six-leaf rosettas, pulling through underneath to form a small arch. These are Tinkerbell’s wings.
Step 4
Turn the handle to three o’clock, pour a small four-leaf rosetta connecting to the wings for her body and another underneath, forming an upside-down T shape for the skirt.
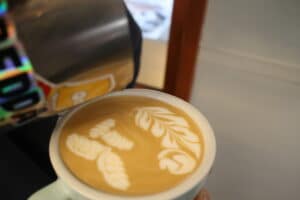
Step 5
Pour a long and skinny six-leaf rosetta along the bottom of the cup.

Step 6
Drag two thin lines beneath the skirt, overlapping the bottom line for legs and a thin line from the top of her body reaching towards the moon.
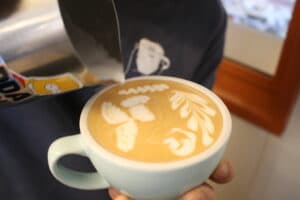
Step 7
At the top of her torso, drop a small amount of foam for her head.
Step 8
Carefully drag a short curve around the head and drop a small amount of foam on top to complete Tinkerbell’s hair.